.png)
If you want to speed up your social media posting workflow, you've come to the right place!
In this post, we'll show you how to set up your content publishing workflow, scheduling automation, and content approval workflow to help you shave hours off your SMM work week.
Why is a social media posting workflow essential for SMMs?

Posting a piece of social content is easy. So why do you need a social media posting workflow?
The reality for social media managers is that strategically posting content across numerous platforms for multiple clients several times a day, seven days a week is a lot of work.
When getting results on social media requires consistently creating, posting, and engaging with your audience, when do you have time to send a content approval or create a performance report?
This is where a thoughtful social media posting workflow saves you time and energy in your work week.
How to build your social media posting workflow

Building your social media posting workflow can be broken down into five steps: research and strategizing, content creation, post scheduling, content approval, and performance monitoring.
Working through each phase as it relates to your agency helps you identify bottlenecks and pain points to address with transparent processes and automation.
Getting a notepad or doc to write notes as you build is helpful. Let's get started!
Step 1 - Content Research & Strategizing

The first step in creating an effective social media workflow is to give yourself time to actively research and think strategically about content before making it.
Understanding who you're creating content for and why saves you a lot of time and energy in this step since it gives you direction and focus.
The most common organic social media campaigns include brand building and awareness, audience engagement (likes, comments, shares, etc.), and customer retention.
You can also use organic social content to lift sales, but this strategy tends to be most effective when boosted with an advertising budget and campaign.
It helps to break down your research into a focused goal when starting your content research. A great place to start is by filling in the blanks of this sentence, "I'm creating a campaign for <target audience> to <name a specific, measurable outcome> for <specified time frame>, as measured by <relevant metric(s)>."
If that sounds SMART to you, it's by design! Keeping your objectives specific, measurable, achievable, relevant, and time-bound sets you up for success by keeping you on track.
Remember that every campaign is a little experiment you use to test a hypothesis. Setting SMART goals from the outset lets you report objectively on the campaign, even if it doesn't perform as expected.
Once you established some parameters, start brainstorming and researching similar content to understand what works in the space.
This is especially true for SMMs managing clients in industries they aren't familiar with (like orthodontics or Shao Lin kung fu - are you an expert in those?) to get a sense of the language and imagery used for these audiences. Using a mood board app, like Milanote or Figma, can help you flesh this out further by client or industry.
Step 2 - Content Creation

After fleshing out your research and strategy, you're ready to start creating and scheduling content. And if you've established the time frame for your campaign, you can work backward from there to determine how many posts within that period of time makes sense.
Everyone's content creation process is different, but an excellent place to start is by mapping the action you want your audience to take to a specific piece of content you want to share with them.
But that's not the only puzzle piece; injecting value into the post is crucial. This underscores the importance of the research phase because what is valuable to your audience will differ from segment to segment.
Creating a consistent brand experience across all channels is one core responsibility of any marketer. So as you begin creating content, look for opportunities to templatize your work. Not only does this create consistency in your content, but it also saves you time creating new content from scratch.
This method is handy for recurring or thematic content you post regularly, like Monday Motivation posts or Throwback Thursdays.
Some marketers like to start by writing social media captions first, then creating imagery to support them, while others prefer to tackle graphics first. As a content marketer by trade, I've found it helpful to begin with the copy, then develop the imagery.
My reason for this is to stay focused on the goal of the content, which is like the skeleton of the post. It might not be the flashiest part of the post, but it holds the content together and gives it context. Starting with the design first can often overlook the post's goal or get conflated by an exciting design.
Whichever route you choose, ensure your message and call to action are clear and relevant to the content and your audience. Don't expect content without some CTA to perform well consistently.
For our Cloud Campaign power users, we've built some incredibly powerful content creation tools within the platform.
For example, you can search Google News for relevant articles based on keywords, then add them to your library as sharable content with just a click.
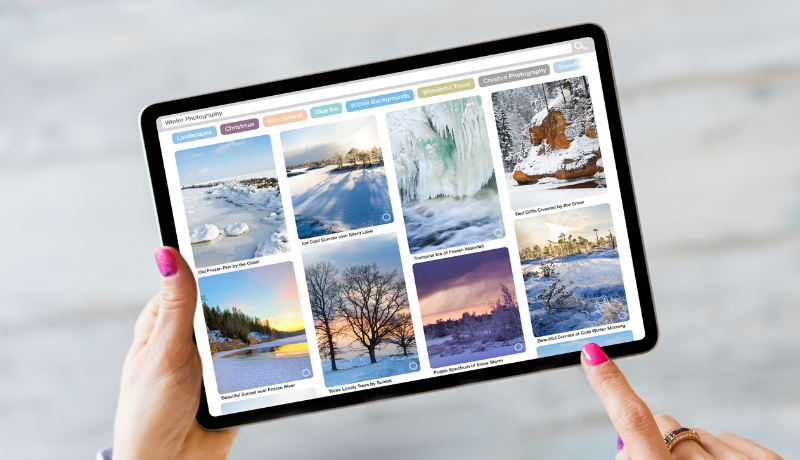
If you share a lot of imagery to get your point across, you can search Pexel's library of delightfully high-quality stock images for royalty-free use.
You can also search Instagram for keywords for UGC, content research, or to re-share and import them as posts into your content library with a single click.
We also built Canva into the platform, meaning you don't need to change apps when switching to creator mode. And with the ability to automatically import images from Google Drive and RSS feeds as social content, you have no shortage of content sources!
While writing the copy first is a great way to establish a post's structure, agencies often get stuck at the blank page. You can jumpstart this process by using CaptionAI. To make these captions even more effective, pair them with AI-Powered Workspace Profiles.
This allows you to store specific brand personas and local nuances for each client, so the AI automatically writes in the correct brand voice, saving you from constant manual editing.
Similarly, if your workflow is slowed down by searching for the perfect image, you can now use ImageAI.
Instead of settling for stock photos that might not perfectly match your message, ImageAI allows you to generate realistic, brand-aligned visuals directly within the platform. This ensures your imagery is as tailored as your copy, all while keeping your entire creation process in one place.
Step 3 - Social Media Post Scheduling

Once your social media content is created, you can move on to post-scheduling.
While some platforms offer limited capabilities to schedule posts in advance, SMMs managing more than a handful of clients benefit from a post-scheduling automation platform. Check out our post about when you should pay for social media management software to learn more.
There are two ways to divide up your social media post-scheduling streams. One content stream will consist of one-time-use content.
This is your time-relevant content, announcements, in-the-moment posts, or ephemeral content. With this type of content, you usually create one piece of content for one post and trade relevancy for longevity. Creating this type of content can take more resources, so a blended strategy is recommended.
The other part of your scheduling strategy should comprise recurring and recycled content. This content holds its value regardless of time, also known as evergreen content.
A great example of this type of content is an informational blog post. If the content remains accurate over time, you can create a range of unique content driving to a post at a cadence that makes sense for your strategy.
To maximize your effort and reach, use a blended strategy of evergreen and in-the-moment content when planning your weekly and monthly social media content calendar. I recommend plotting what content you want to post daily to make automation easier.
You're in luck if you're using Cloud Campaign to automate social media post scheduling! We've made it easy to schedule content at scale. You can drag and drop content onto the content calendar to automatically schedule content at the time for optimal engagement.
For recurring content, our powerful Category Tags let you organize your content and set triggers for automatic posting. Just set up an automatic posting schedule for the days and times you want, choose a category to pull from and any post tagged with that category will be scheduled for the next available time slot. Check out our post on How to Automate Your Social Media Posting Using Category Tags for more tips!
And no worries if the content has yet to be approved. With Cloud Campaign, the content will be posted once it's approved by an authorized account - which we'll discuss next.
Step 4 - Creating Your Social Media Approval Process

Before content is posted, it typically needs to be approved by internal and external stakeholders such as team members or managers, and clients. But getting content approval can be trickier than herding cats if you don't have a robust content approval workflow in place.
Social media approval workflows should be easy to implement and track. You'll need to include both the imagery, copy, and potential strategy or intention for the post in your approval, along with any specific requests for feedback.
Scrappy marketing agencies have gotten away with using free solutions such as Google Docs to create social media approvals. But this time-consuming manual process doesn't put the most professional foot forward. Plus, using tools not designed for the job means shoehorning features and solutions to make it work. Wouldn't it be great if your approval process was automated?
Well, if you're using Cloud Campaign - you're in luck once again! Cloud Campaign takes the work out of creating a social media approval process by integrating a social media approval tool right into the platform.
Go to the Approvals tool in the navigation bar, click New Approval, and add a title for your approval. Next, click Select Content to pick which posts you want to include in the approval. You can search your library for content using the Category tags, search bar, or filtering tools.
Once you've selected the content you want to include, click Add Items to add them to the approval. You can also use the Internal Approval toggle if you review content within your team before sending it to your clients so they don't receive those communications. There's also room to add any comments or instructions to the approval.
Click Create Report once you're ready, and in seconds you'll have a sharable link you can send to your team or clients for review. Viewers can access the approval from any browser, including mobile, and leave timestamped comments and image responses on content.
Reviewers can approve individual posts or all content simultaneously, with relevant notifications sent to the team when needed. And because content will only post to social media if approved, you can schedule content ahead of time and send out content approvals only when required.
Step 5 - Performance Monitoring

The job of a social media manager is still ongoing after creating and posting content - you also have to show results and make decisions based on campaign performance. This is where having a fast and easy way to generate actionable reports is critical to honing your social media strategy.
It's much easier to identify and report on relevant metrics to your team and clients If you did your due diligence preparing your content strategy at the beginning of your campaign.
Generally speaking, your stakeholders will want to know how many people saw the content (impressions) and engaged with it (like, share, comment, or save) regarding organic social media content.
For paid social content, reviewing your number of conversions versus your cost, or cost per conversion, is essential. You'll also want to monitor your total spend, number of impressions, total clicks, and total lead count to ensure your paid strategy remains cost-effective.
Having software or a platform to generate reports you, your team, and your clients can understand is critical for building trust and making informed, data-driven decisions. Thankfully, we've taken the heavy lifting out of this part of the social media workflow with our built-in Reporting tool.
Just navigate to the Reports tool in the navigation bar, give it a title, date range, and select any advanced options you want, and presto! In seconds you'll have a responsive, interactive social media performance report you can share via a web link, PDF, or spreadsheet. Did I mention reports can be white-labeled with your branding? Well, they can!
Putting Your Social Media Posting Workflow In Action
The most effective social media posting workflow for SMMs integrates and automates your most time-consuming tasks so you can focus on the more strategic aspects of your work. And while every marketing agency operates differently, finding a flexible platform to manage your workflow is essential for managing clients at scale.
If you're ready to start building your ultimate social media content workflow, click here for your two-week Cloud Campaign trial to see how much time you can save in your work week!


Want to grow without expanding your fulfillment team?
CloudStudio helps agencies automate the technical grind of social media management so your team can spend less time posting and more time growing accounts. Reserve your spot now.
.png)


.png)


.avif)


.avif)


.avif)