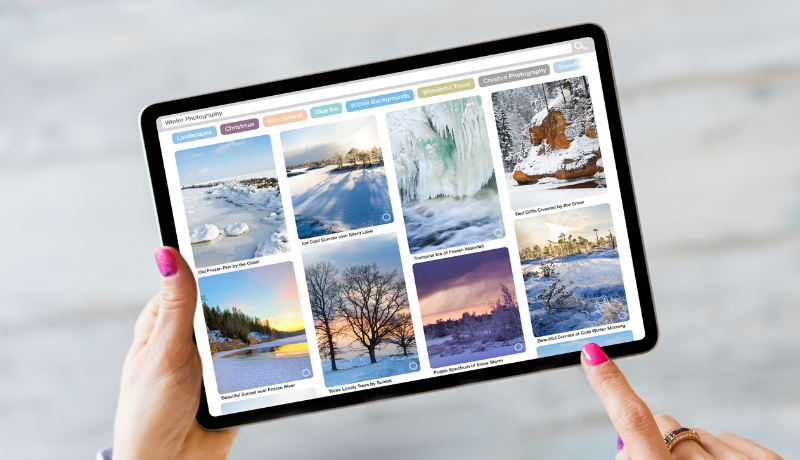
.png)

In the second part of our Mastering Categories series, I’ll show you how to automate your social media posting with Category Tags within Cloud Campaign.
Subscribe to stay tuned for our upcoming guide on running content experiments using Category tags.
As I mentioned in my post on How to Organize Social Media Content with Category Tags, categories are a powerful way to organize the content in your workspaces, automate your social media posting, and conduct content experiments.
Check it out if you still need to learn more about the foundations of Category Tags.
What is automated social media posting?
Automated social media posting uses specialized software, like Cloud Campaign, to manage, schedule, and post pre-made content on social media platforms at predetermined times.
This saves time-crunched social media marketing managers from having to log in to dozens or hundreds of accounts per day to post content.
Savvy SMMs can schedule their content months ahead, allowing them to focus on strategy and other essential tasks. Content automation should comprise the bulk of your strategy to see consistent results on social media.
What are the types of social media automation?
Did you know there are a few ways to automate your social media posts and not social media automation is the same? Allow me to explain.
Social media content automation can be broken down into drip campaigns and ephemeral content. Both play an essential role in your marketing strategy.
What are social media drip campaigns?
Drip campaigns, also known as evergreen campaigns, posts content that stays relevant regardless of how much time has passed.
Educational content, blog posts, infographics, and other content that doesn’t require updating or time-based context are great examples of evergreen content. Check out our post on How to Use Content Pillars In Your Social Strategy for more content tips.
This content can be shared throughout the year with adjustments to boost engagement and extend the life of the content indefinitely if you want! I’ll show you how when we dive into content recycling and multi-caption posts later.
What are ephemeral social media campaigns?
In contrast to drip campaigns that are used repeatedly, ephemeral content is content that is shared only once.
This can include in-the-moment posts, like at an event, or planned weekly thematic content, like Throwback Thursdays.
Ephemeral content, particularly pre-planned weekly content, is a great way to keep your calendars full.
How to automate your social media posts with Cloud Campaign
Thankfully, automating your evergreen and ephemeral social media posts is easy with Cloud Campaign.
If you haven’t already, check out our post on how to use category tags to organize your content library and set up some posting categories.
Try creating a category tag to represent an automated content stream you want to set up, like Throwback Thursday.
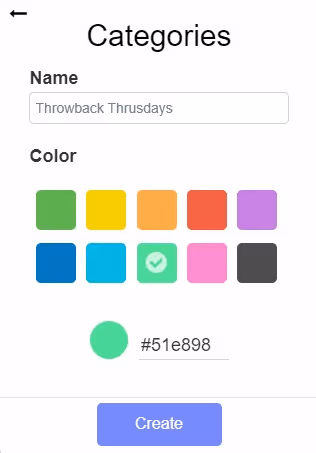
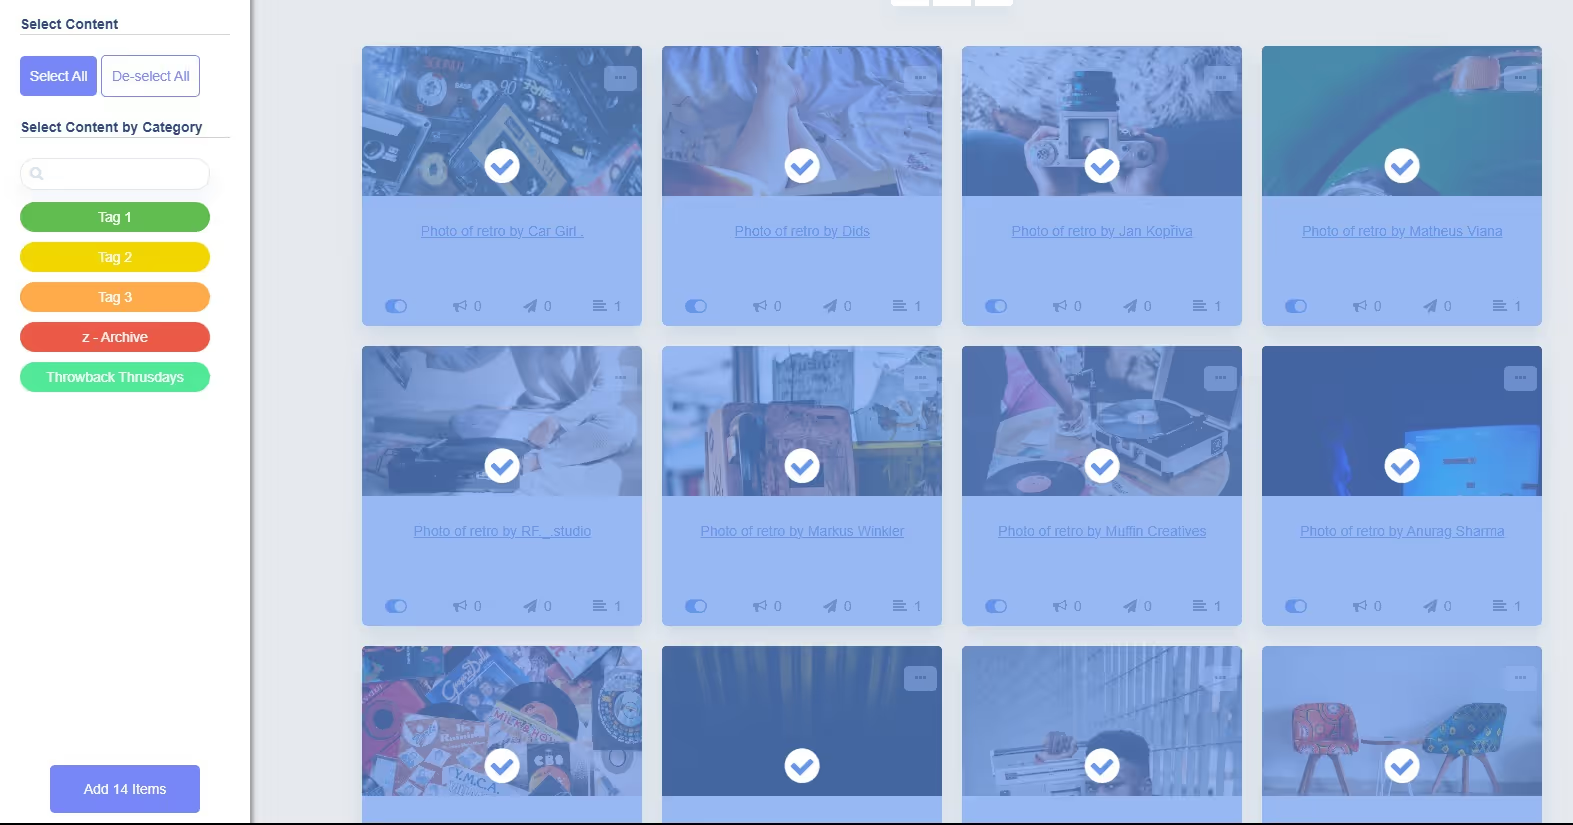
Next, tag the content you want to include in this automation with the tag you created. You can do this post by post or by using the bulk tagging operation.
Now, head over to Schedules from your navigation bar. Schedules are displayed as time slots or queues, which you can toggle between at the top.
Time slots are a great way to see your content schedules on a calendar view.

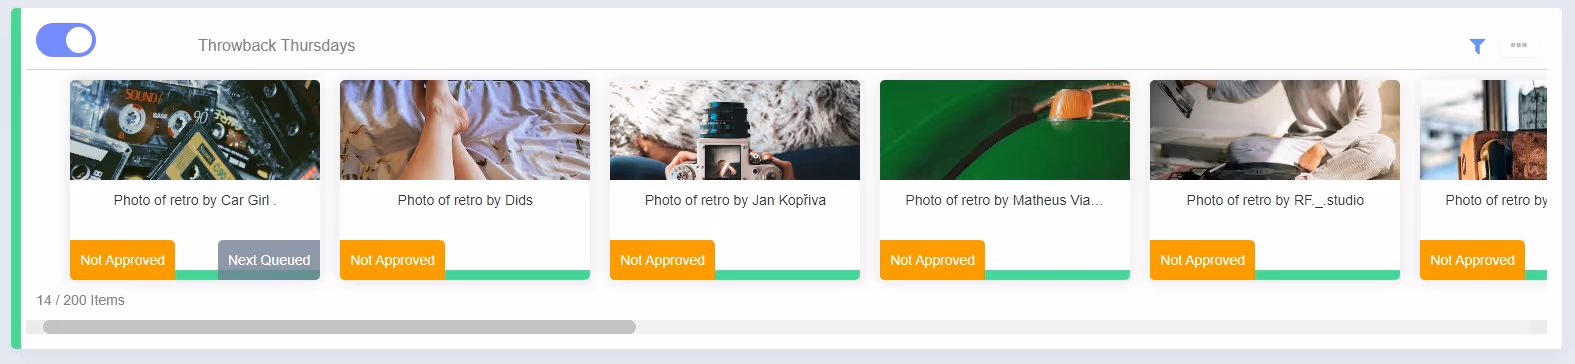
The Queues view shows your content schedules and upcoming posts in a “hopper” style view.
From here, you can use the search and filter bar to sort through your created schedules, turn schedules on or off, re-shuffle or add new content, or delete the schedule.
Click Create Schedule to make a new schedule and select if you want to create a weekly or drip schedule.
Give your schedule a clear title, and select the timezone and day and time slots you want the content to post on. You can add multiple days and times to create a cadence that suits your goals.
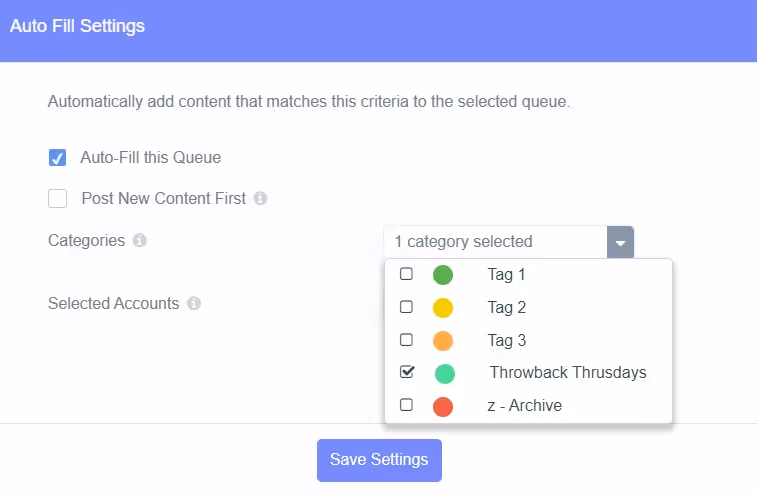
Then you can select if you want to auto-fill the queue by pulling in content matching specific criteria, such as a category tag.
You can also create new content from scratch or add existing content to the schedule to save time filling the queue.
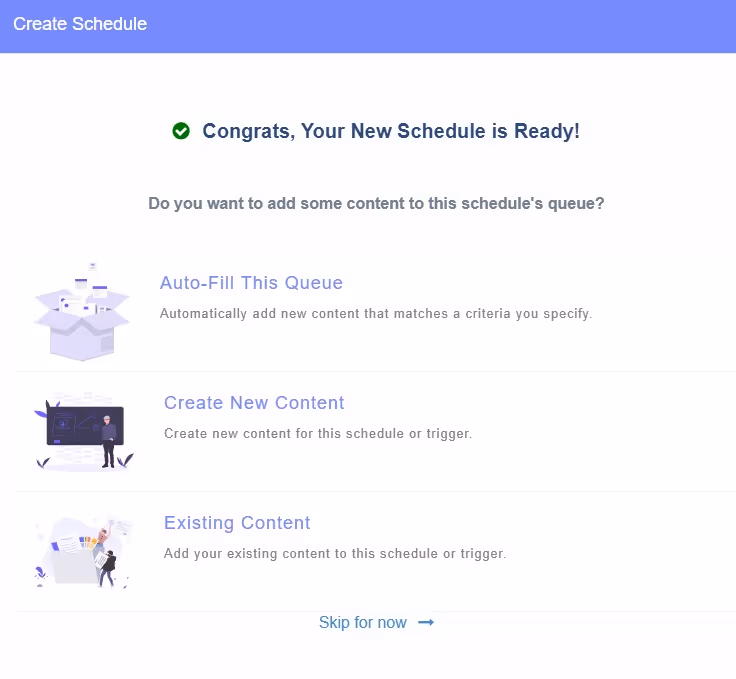
If you’re auto-filling content, select Auto-Fill This Queue and the categories you want to pull from. You can also elect to prioritize posting new content first and the accounts to post to by default.
You should then see your schedule fill up with content based on the parameters you’ve set. You can quickly shut off any schedule using the toggle.
Additionally, any content pulled into the schedule that hasn’t been approved will not be posted. This allows you to create and schedule content in advance, then get approval as needed without the risk of mis-posting.
Now that you’ve set up a recurring posting schedule, all you have to do is tag new content with the corresponding category to automate your social media posting.
Automate social media posting with advanced features
At this point, you should be familiar with how to apply categories to posts in your content library and use them to organize and automate your social media posting.
Next, I’ll show you two advanced automation features to take your social media scheduling to the next level.
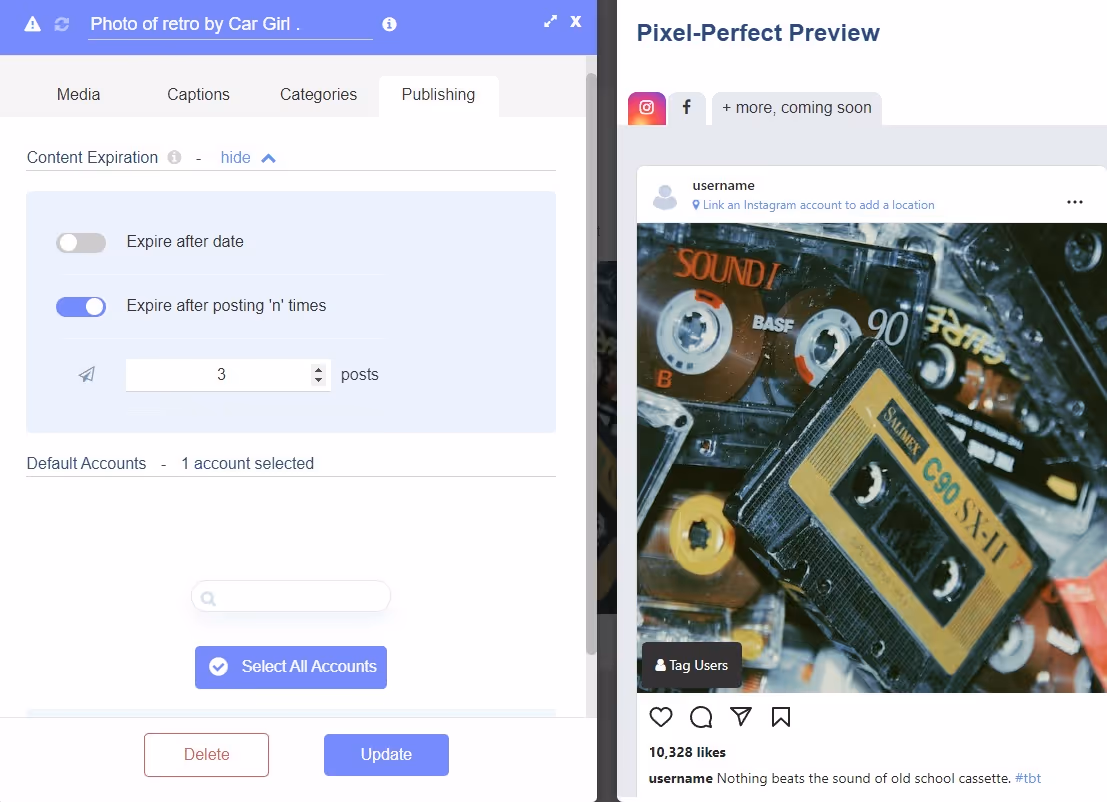
Using Multi-Caption Posts to Recycle Content
One powerful feature to boost the visibility and engagement of your content, especially evergreen content, is multi-caption posts.
This allows you to “recycle” or reuse previous visual content and present it in a new way by sharing a new caption every time the content posts. This keeps the content fresh and relevant while not penalizing you for posting duplicate content.
Open a piece of content, go to Captions, write out your copy, then click Add Caption. You can repeat this process to add more captions to the post.
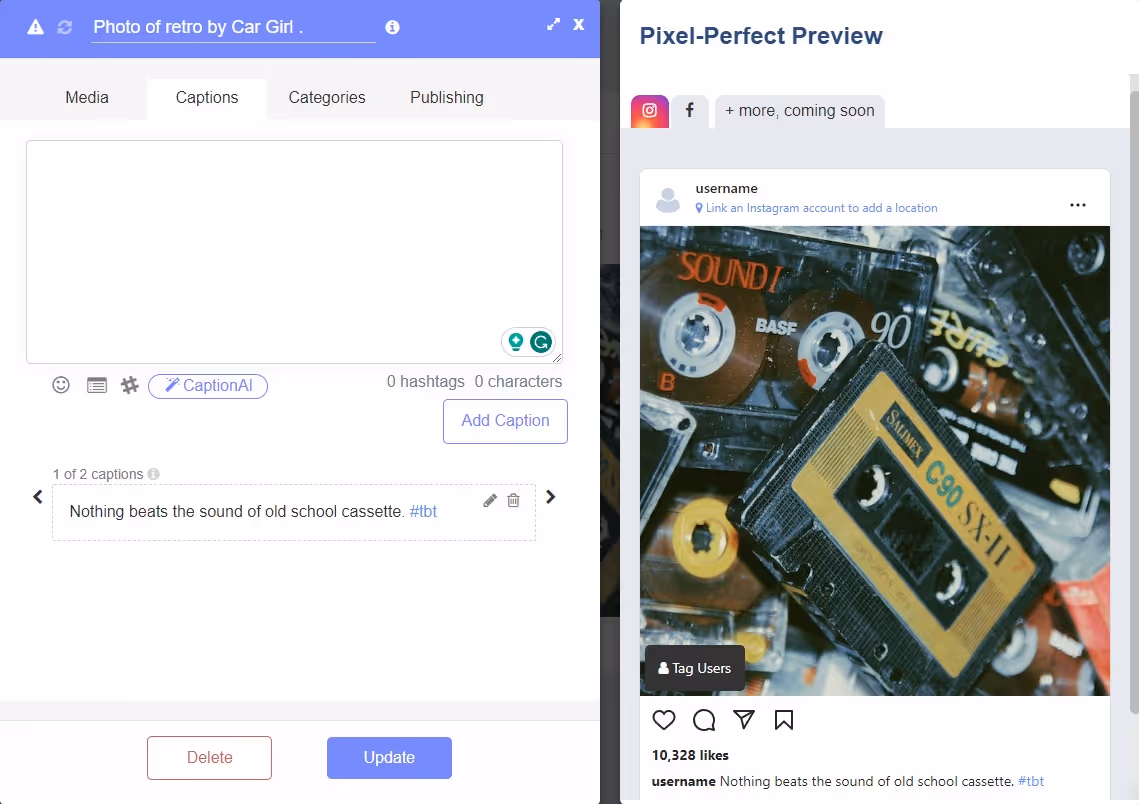
Every time the content is posted, it will move through each caption until you set the content expiration based on the number of times posted or a specific date.
Using Google Drive & RSS Feed Auto Importer
This method leverages our built-in Google Drive and RSS feed integrations to help you create and schedule content at scale. Here’s how it works.
First, go to Auto Import from the navigation bar. Then, click new source.
From here, you can connect specific Google Drive folders to link to Cloud Campaign.
Any time a new image is uploaded to the connected folder, Cloud Campaign will automatically create a social media post containing that image. Then, you can go into each post to add a caption.
You can also choose to apply a category tag to this content when it is imported. This allows you to track imported content as well as set triggers to schedule the content.
This workflow works great with collaborative teams that rely on content creators to create content. Just give the creators access to upload to Google Drive and let Cloud Campaign do the rest!
RSS importing works in a similar fashion. Link the RSS you want to pull content from, like a blog, and Cloud Campaign will automatically create a social post when new content is published.

It will even scan the content and attempt to pull in key snippets or headlines, depending on how the content is formatted.
This is great for quickly importing and sharing blog content, as it also includes a direct link to the content on platforms that support it and an image if one is available. You can also edit the content’s caption and image later.
This method also allows you to apply category tags as the content is imported to automate your blog as social media content quickly.
Spreadsheet Importing
You can also upload and schedule content in bulk using our CSV spreadsheet template. This is the fastest method for creating and scheduling content in bulk.
Simply fill out the spreadsheet using these parameters listed on our support page. You can schedule content using the template or assign the content a category tag from within the template.

Using this method, you can assign multiple categories to a single piece of content. Entering a category that doesn’t currently exist in your workspace will create that category once it is imported.
When the content is imported, any schedules using those tags will pull the content into its queue.
Use this workflow to create and schedule months' worth of content in advance to save hours from your social media work week.
Start Tagging Now!
We hope this guide to category tags helps you automate your social media posting. Click here to log in and start tagging now.
If you’d like extra help learning to use Category Tags, click here to schedule a demo with our team.
Not using Cloud Campaign to automate your content? Do you need help to keep up with the massive amount of content required for social media? Click here to try our all-in-one SMM platform for two weeks, FREE!


Want to grow without expanding your fulfillment team?
CloudStudio helps agencies automate the technical grind of social media management so your team can spend less time posting and more time growing accounts. Reserve your spot now.
.png)


.png)


.avif)


.avif)


.avif)